Do you want to add a WordPress widget to your Website’s Header area? Widgets are very important to add new elements to your WordPress website or blog such as Ads, Archive, Custom Links, Banners etc. If your WordPress theme has not a Header widget and you want to show ads on your website header then you need to add a Widget area to your Website’s Header. In this Article, I will tell you “How to Add a Header Widget on WordPress Website” Step by Step.
Why You need to Add a Header Widget to your WordPress?
Basically, every blogger use header widget for showing ads on the website header and if you want to add ad code to your Website Header then you need to add Widget area here. You can also, add ads to your WordPress header by doing some coding on your Theme’s Header template but I think Widget area will help you more than the manual coding on your Website theme. Because after creating widget area you can add everything as well as ads such as display recent articles, Adding Search Box, Social links and more.
How to Add a Header Widget on WordPress Website
So, Now if your WordPress theme has not header widget area then use the following steps to add a new widget area on your theme’s header.
Step 1: Creating a Header Widget
In the first step, we need to create a Custom Header Widget area. After creating this widget area you will be able to add elements to it by going to WordPress dashboard Appearance > Widgets page. For creating a new widget area on your WordPress theme. You need to edit your functions.php file and add the below code in the very last line.
function pw_widgets_init() {
register_sidebar( array(
'name' => 'My Website Header Widget Area',
'id' => 'header-widget-area-1',
'before_widget' => '<div class="pw-widget">',
'after_widget' => '</div>',
'before_title' => '<h2 class="pw-title">',
'after_title' => '</h2>',
) );
}
add_action( 'widgets_init', 'pw_widgets_init');
After, adding this widget you have successfully registered the new Widget area on your theme. Now you can go to your WordPress dashboard Appearance > Widgets. Here you can see a new widget area labeled with ‘My Website Header Widget Area’ because we have given this name to the new widget area.
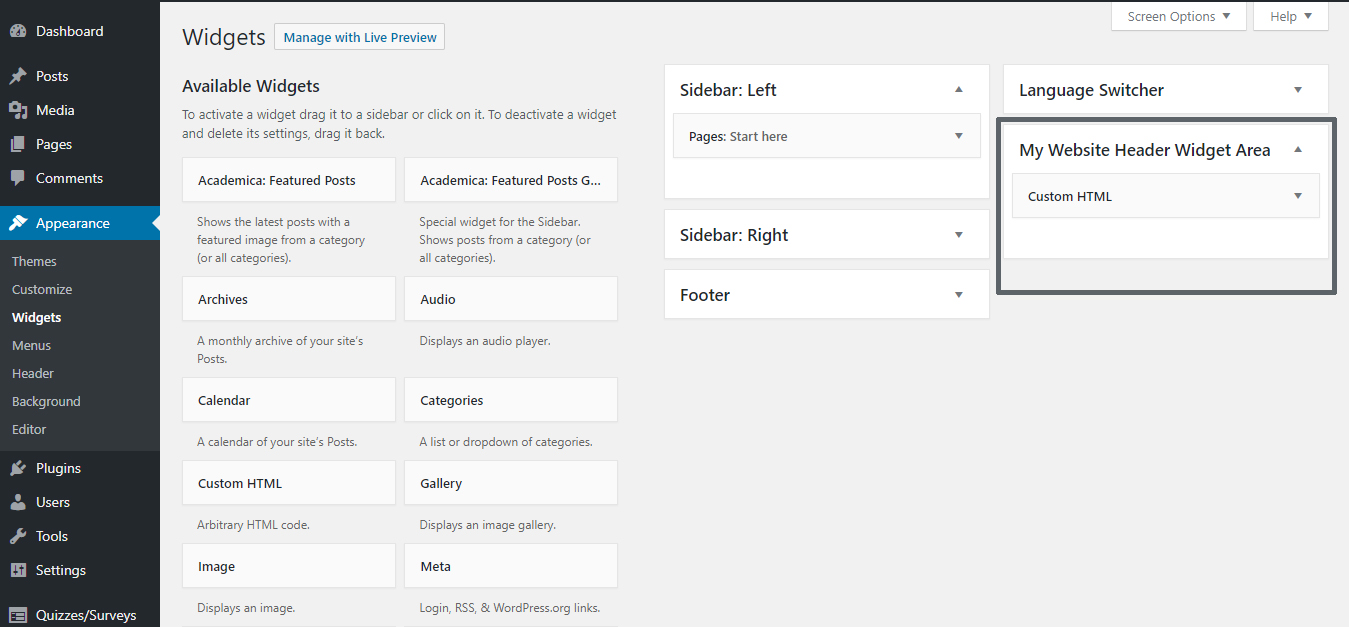
Custom Widget Area after Registration
Now add a banner ad to this widget area and save it.
Step 2: Display your Widget area in your WordPress Header
After registering your widget area on WordPress functions.php file you will be able to add elements to it but it will not appear on your website. Because at this time WordPress has not know where you want to display this widget area on your website theme. So for display the elements or ads you added to this widget area you need to edit your Theme’s header.php file. So open header.php file and add the below code before opening tag of nav. (<nav> is your Navigation bar opening tag).
&lt;?php if ( is_active_sidebar( 'header-widget-area-1' ) ) : ?&gt; &lt;div id=&quot;header-widget-area&quot; class=&quot;pw-widget-area widget-area&quot; role=&quot;complementary&quot;&gt; &lt;?php dynamic_sidebar( 'header-widget-area-1' ); ?&gt; &lt;/div&gt; &lt;?php endif; ?&gt;
After, adding the above code on your header.php file your elements will be looks like this.

Display of Widget area
This is the Default preview of your Header widget area.
Step 3: Styling your Widget area using CSS
For styling, this widget we need to add some CSS code to our theme. For doing this work you can use CSS Hero WordPress plugin or go to dashboard Appearance > Customize. In this window, you will need to click on ‘Additional CSS’ tab and put the following CSS code on here.
#header-widget-area{
width:65%;
float:right;
padding:10px;
padding-left:50px;
padding-top:0px;
padding-bottom:20px;
}
#site-title{
float:left;
padding-top:15px;
}
@media screen and (max-width: 480px){
.pw-widget-area.widget-area
{
clear: both;
float: left;
margin: auto;
width: 100%;
position:relative;
}
}
@media screen and (max-width: 480px){
.logo-left {
width:100%;
float:left;
}
}
After adding the above CSS code on your WordPress Additional CSS window the widget will be looks like this.
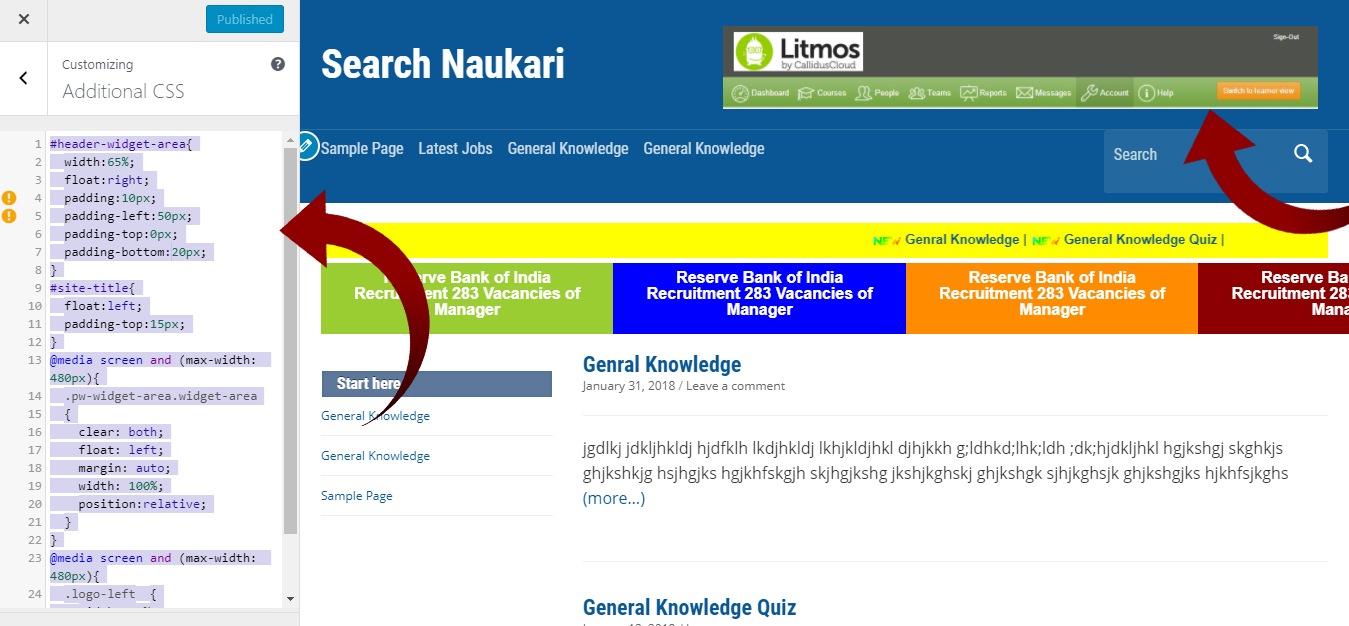
Custom Widget Area on your WordPress with CSS
You can adjust the CSS to match your WordPress theme.
I Hope, This article will help you to know about “How to Add a Header Widget on WordPress Website”. But if you have any queries related to this post then leave a comment. Bookmark this page for getting latest updates on this topic.